How to install on a Network or Remote Desktop Server
Prerequisites
- The installation requires administrator rights and permission to run an MSI installer.
- Create a central repository folder on your network for the program files. All PostTrans users need full access to this folder.
- Keep a record of this location because future upgrades will be installed there and then distributed to users.
Install on the network
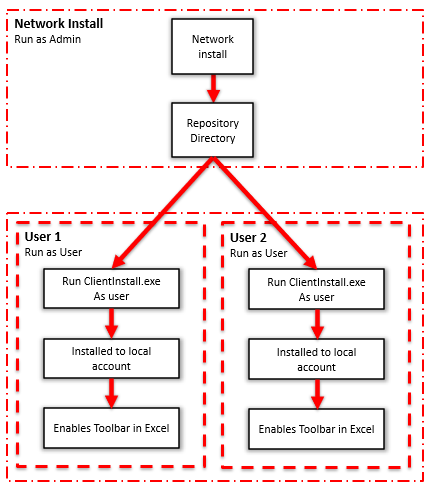
Download and run the Sage 200 network installer:
Download for Sage 200 2015 (V10 onwards) Network Install
Select your repository folder during installation.
Install for each user
Log in as the user who needs PostTrans and run ClientInstsall.exe from the repository folder. Run it as the logged-in user; do not elevate it to administrator. This copies the required files into the user's account and enables PostTrans within Excel.
Then follow steps 2 onwards on the normal download page.
How to upgrade
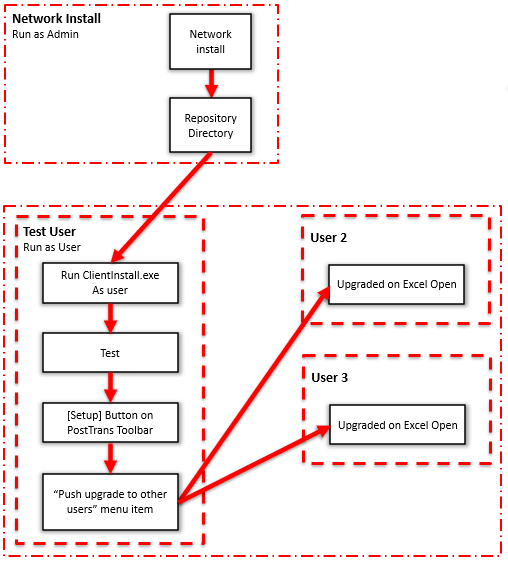
Run the Network Install again and select the same repository folder. The installer normally remembers the location.
Cannot remember the location? In an existing installation, press Setup on the PostTrans toolbar. The licensing and version information at the bottom of the setup window includes the repository folder.
Test for one user
Run ClientInstsall.exe from the repository folder to upgrade the current user, then test PostTrans for that user.
Push the upgrade to all users
From the PostTrans toolbar, press Setup. At the top of the setup window, select Push upgrade to other users. Other users will then be upgraded the next time they open Excel.